
A DIY 5.1 or 7.1 surround sound setup involves strategically placing speakers around a primary listening position to create an immersive audio environment. A standard 5.1 surround sound setup requires five speakers (front left, center, front right, two side surrounds) and a subwoofer, while a 7.1 surround sound setup diagram adds two rear surround speakers for a more enveloping soundfield. Beginners can achieve professional-grade results using affordable AV receivers from leading brands like Denon, Yamaha, Marantz, and Onkyo, paired with entry-level speaker packages from ELAC, Polk Audio, or Klipsch. The process requires no specialized electrical tools—just careful adherence to a 5.1 surround sound setup diagram, precise wire stripping, and automated calibration using your receiver’s built-in microphone system (e.g., Audyssey MultEQ, YPAO R.S.C., or AccuEQ).
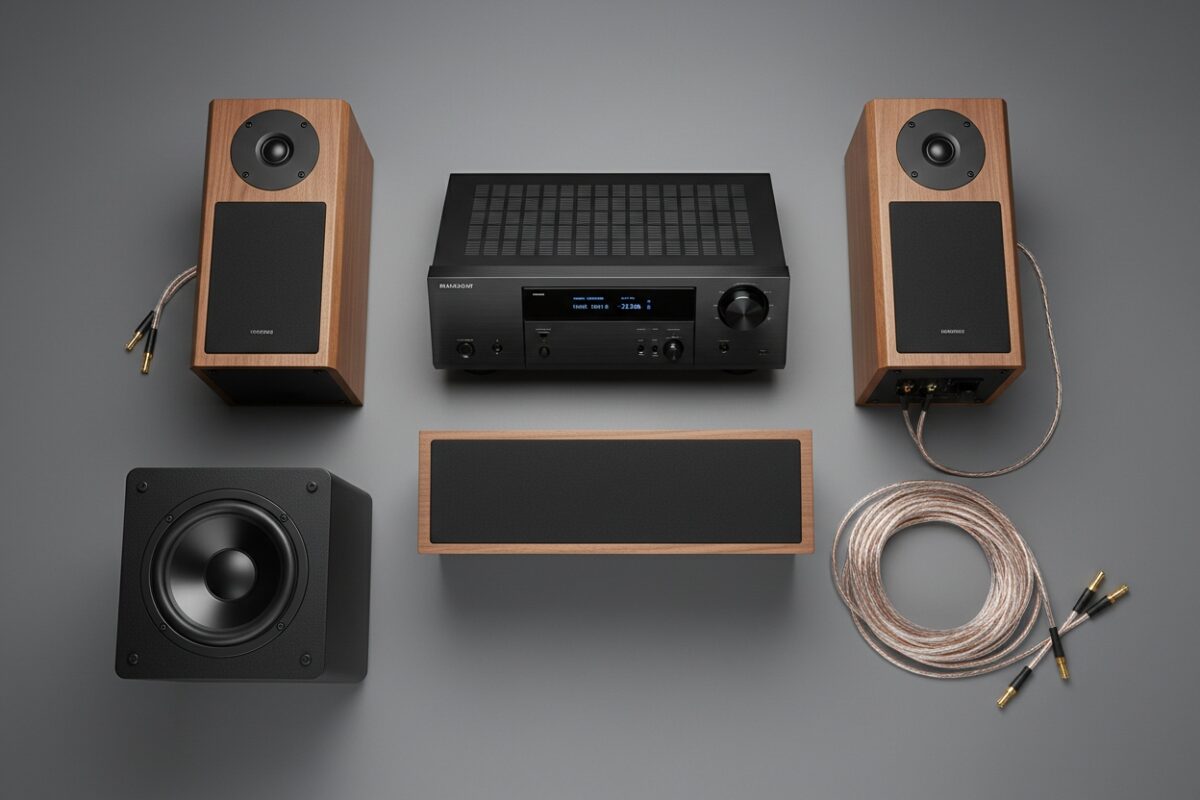
Table of Contents
- 1 Understanding Surround Sound: From Stereo to Object-Based Audio
- 2 The 5.1 Surround Sound Setup Diagram: The Industry Standard
- 3 Expanding to 7.1: The 7.1 Surround Sound Setup Diagram
- 4 Speaker Wire, Connection, and Signal Flow Best Practices
- 5 AV Receiver Calibration: Optimizing the Listening Environment
- 6 Acoustic Treatment for Small to Medium Rooms
- 7 Common DIY Pitfalls and Troubleshooting
- 8 FAQ: Answering People Also Ask Queries
- 9 Building Your Authority-Driven, Personalized System
Understanding Surround Sound: From Stereo to Object-Based Audio
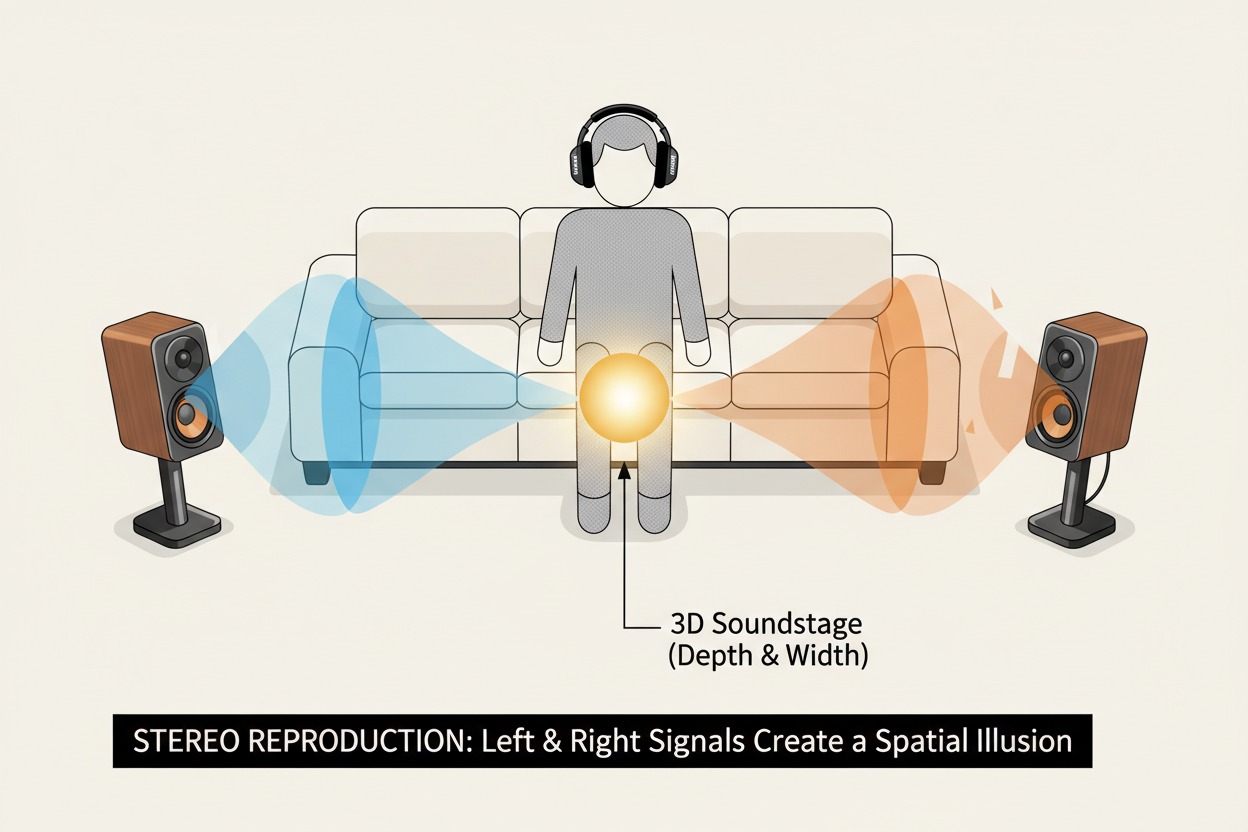
The evolution from basic stereo (two channels) to multi-channel surround sound revolutionized how audiences experience movies, music, and competitive gaming. While stereo creates a left-right soundstage, surround sound introduces dedicated audio channels for dialogue, ambient effects, and directional cues. The two most common configurations for home theater systems are 5.1 and 7.1, each offering distinct advantages based on room dimensions, content libraries, and listening preferences.
Core Entities and Hardware Relationships
To build a successful DIY system, you must understand the relationship between these core entities:
- AV Receiver (Audio/Video Receiver): The central hub and signal processor. It decodes advanced audio codecs like Dolby Atmos, DTS:X, Dolby TrueHD, and LPCM, amplifies signals for passive speakers, and manages HDMI switching. Modern receivers from Denon (model series AVR-S760H) or Yamaha (RX-V6A) include automatic room correction.
- Passive Speakers: Each channel requires a dedicated speaker. Bookshelf speakers (e.g., ELAC Debut 2.0 B6.2) work for front and surround positions, while a center channel (e.g., Klipsch RP-504C) anchors dialogue reproduction.
- Powered Subwoofer: Handles Low-Frequency Effects (LFE), providing the “.1” in both 5.1 and 7.1 setups. Models from SVS (SB-1000 Pro) or Monoprice offer deep extension for cinematic explosions.
- Speaker Wire: 14-gauge oxygen-free copper (OFC) wire is standard for runs exceeding 50 feet; 16-gauge suffices for shorter distances. Banana plugs simplify connections.
- Room Acoustics: Furniture, carpeting, drywall, and glass influence sound reflection, absorption, and reverberation time (RT60), directly affecting speaker placement strategies.
Topical Authority: The Physics of Sound Propagation
Understanding how sound waves interact with physical space builds topical authority. Low-frequency waves (subwoofer range, 20–80Hz) are omnidirectional and long, making corner placement effective for coupling. Mid-range frequencies (vocals, 300–3kHz) are directional; this is why the center channel must be aligned precisely with the TV. High frequencies (tweeters, 5kHz+) are highly reflective, requiring careful aiming to avoid harsh reflections off hard surfaces.
The 5.1 Surround Sound Setup Diagram: The Industry Standard
A 5.1 surround sound setup diagram is the baseline for home theater, used across streaming services, Blu-ray discs, and standard broadcast TV. According to the Audio Engineering Society (AES) , this configuration remains the most widely adopted for consumer homes due to its balance of immersion and wiring simplicity.
Component Placement and Specification
- Front Left & Right Speakers: Placed at ear level (seated position), forming an equilateral triangle with the primary listening position. They handle music, stereo effects, and background audio. Recommended separation: 60–90 degrees from center.
- Center Channel: Positioned directly above or below the display, aimed at the listener’s ears. It anchors dialogue reproduction, preventing “panning” effects where voices appear to move across the screen.
- Surround Left & Right Speakers (Side Surrounds): Placed 90–110 degrees to the sides, slightly above ear level (2–3 feet). They deliver ambient effects and directional cues like rain or passing vehicles.
- Subwoofer: Place at 1/3 or 1/4 room width from a side wall. Perform a subwoofer crawl for optimal placement: place the sub at your listening position, crawl around the room, and note where bass sounds most balanced.
5.1 Surround Sound Setup Diagram (Textual Representation)
        [Front Left] ---------- [TV] ---------- [Front Right]
                   \              |               /
                    \          [Center]         /
                     \            |            /
                      \------[Listening]-----/
                                |
               [Side Surround L]           [Side Surround R]
Practical Application: Calibrating Subwoofer Crossover
Setting the correct crossover frequency is critical. The THX standard recommends 80Hz. In your AV receiver’s menu, set all speakers to “Small” (even if they are large). This redirects bass frequencies below 80Hz to the subwoofer, reducing strain on the main amplifiers and improving headroom. For smaller bookshelf speakers, a crossover of 100–120Hz may be necessary to prevent distortion.
Expanding to 7.1: The 7.1 Surround Sound Setup Diagram
A 7.1 surround sound setup diagram adds two rear surround speakers, creating a 360-degree audio bubble. This configuration excels in larger rooms and with lossless audio formats like DTS-HD Master Audio and Dolby TrueHD.
Speaker Roles and Arc Angles
- Rear Surround Left & Right: Positioned directly behind the listening area (135–150 degrees from center), at or slightly above ear level. They handle precise rear effects, such as footsteps behind you in horror films or ambient crowd noise in sports broadcasts.
- Side Surrounds (Surrounds in 7.1): Remain at 90–110 degrees, but shift slightly forward to avoid overlapping with the rear pair. This maintains the “pinhole” effect of sound moving discreetly from front to back.
7.1 Surround Sound Setup Diagram (Textual Representation)
        [Front Left] ----------- [TV] ----------- [Front Right]
                   \              |               /
                    \          [Center]          /
                     \            |            /
                      \------[Listening]-----/
                                |
               [Side Surround L]           [Side Surround R]
                        |                          |
               [Rear Surround L]            [Rear Surround R]
                        |                          |
                    [Behind Seat]             [Behind Seat]
Speaker Spacing and Height Adjustments
- Front to Rear Arc: Imagine a circle around the listening position. Place front speakers at 22–30 degrees, side surrounds at 90–110 degrees, and rear surrounds at 135–150 degrees.
- Height Offsets: Side and rear surrounds should be 2–3 feet above ear level. This prevents them from overpowering the front soundstage and reduces speaker localization (the ability to pinpoint the exact speaker location).
Data-Driven Decision: When to Choose 7.1
- Room Size: A 7.1 system performs best in rooms over 250 square feet. In smaller spaces, rear speakers may be too close to the listener, creating an unbalanced “near-field” effect.
- Content Source: While streaming services (Netflix, Hulu) primarily mix for 5.1, 4K Ultra HD Blu-ray discs and high-bitrate streaming (Apple TV 4K, Kaleidescape) offer native 7.1 tracks. Gaming consoles (PlayStation 5, Xbox Series X) also support 7.1 with spatial audio via Tempest 3D AudioTech or Dolby Atmos for Headphones.
Speaker Wire, Connection, and Signal Flow Best Practices
Proper wiring ensures signal integrity, preventing impedance loss and electrical interference.
Wire Gauge and Signal Loss
- Impedance Matching: Use 14-gauge wire for runs over 50 feet; 16-gauge for shorter distances. Thicker wire (lower gauge number) reduces resistance, preserving amplifier power.
- Stripping and Polarity: Strip ½ inch of insulation from each wire end. Twist exposed strands tightly, then insert into binding posts. Red to Red (+), Black to Black (-). Reversing polarity (out-of-phase) causes acoustic cancellation, reducing bass response and spatial clarity.
- Banana Plugs: Use dual-banana plugs (e.g., Monoprice 109444) for clean, tool-free connections. They reduce oxidation and make disconnecting for cable management easier.
Cable Management and Electromagnetic Interference (EMI)
- Separation: Never run speaker wire parallel to electrical power cables. This induces 60Hz hum into the signal path. Cross electrical cables at 90-degree angles if necessary.
- Concealment: Use wire channels (e.g., Legrand CordMate) along baseboards or under area rugs. For in-wall installations, use CL2-rated or CL3-rated in-wall speaker wire to comply with U.S. building codes.
AV Receiver Calibration: Optimizing the Listening Environment
Even premium speaker placement fails without proper calibration. Most modern AV receivers include automated room correction systems.
Step-by-Step Calibration Procedure (Audyssey MultEQ / YPAO R.S.C.)
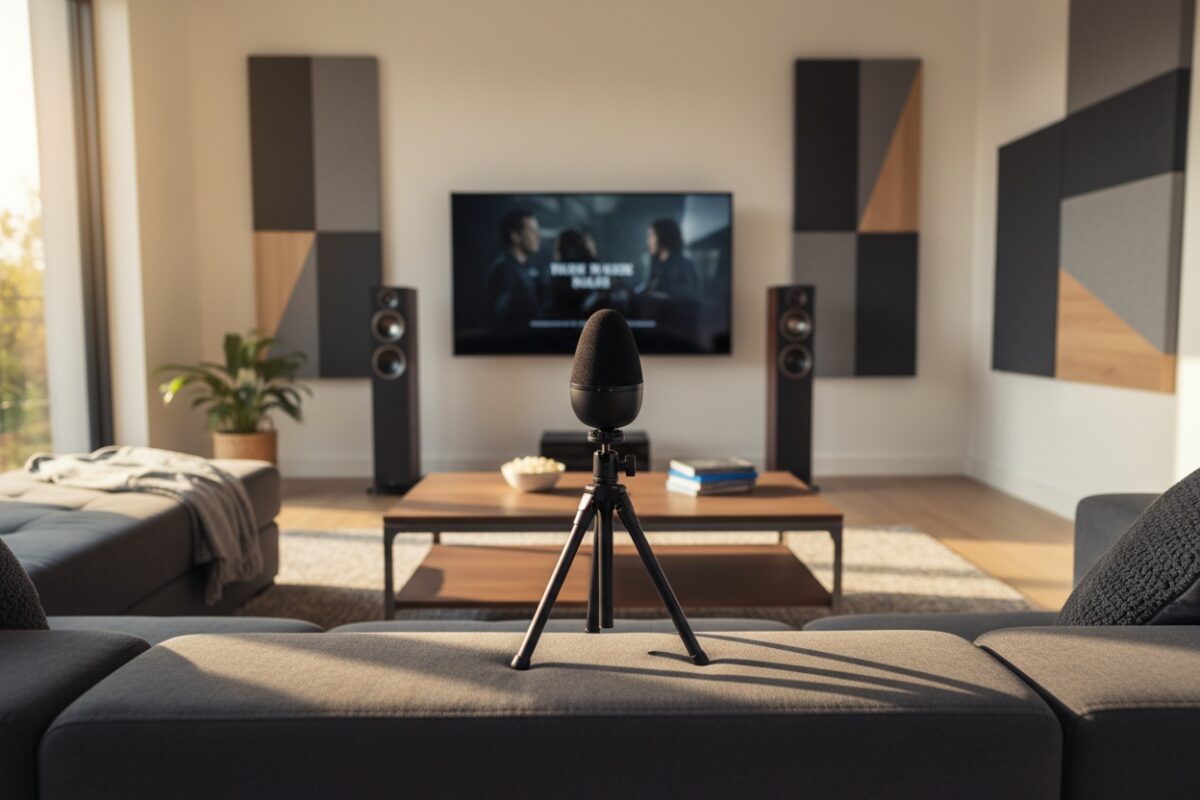
- Microphone Placement: Connect the calibration microphone (included). Place it at the primary listening position, at ear level (use a camera tripod or stack of books). Do not hold the microphone.
- Run Auto-Calibration: The receiver emits test tones from each speaker, measuring distance, level, and frequency response.
- Verify Results:
- Speaker Size: Set to Small for all satellite or bookshelf speakers, even if they can handle bass. This redirects low frequencies to the subwoofer.
- Crossover Frequency: Default to 80Hz (THX standard). For small speakers, increase to 100–120Hz.
- Distance Correction: Manually verify distances if the receiver shows inconsistencies (e.g., a 10-foot speaker reading 20 feet).
- Manual Level Trimming: Use a Sound Pressure Level (SPL) meter (C-weighting, slow response). Each speaker should play at 75dB. Adjust the individual channel trim levels in the receiver menu.
- Subwoofer Gain Setting: Set the subwoofer’s physical gain knob to 50–60% before calibration. After calibration, adjust the subwoofer level to between -5dB and 0dB in the receiver menu to avoid distortion.
Advanced Calibration: Multi-Position Averaging
For a wider sweet spot, take measurements at 3–6 positions: the primary listening seat, left/front of the seat, right/front, and left/right behind it. Receivers average these readings to create a larger, more consistent sound field.
Acoustic Treatment for Small to Medium Rooms
Room acoustics often make the difference between a good system and a great one. The National Association of Broadcasters (NAB) suggests that untreated rooms cause up to 30% signal degradation in perceived clarity.
Treating First Reflection Points
- Side Walls: Place acoustic panels (e.g., Auralex LENRD) at the points where front speakers reflect directly back to the listening position. This reduces comb filtering and smear in the stereo image.
- Floor Reflection: Use a thick area rug between the speakers and listening position. Hardwood floors create early reflections that blur audio localization.
Bass Management and Standing Waves
- Bass Traps: Use corner bass traps (DIY or commercial) to tame room modes. The left and right corners behind the listening position are most effective for reducing 40–80Hz boominess.
- Subwoofer Positioning: Avoid placing the subwoofer flush against a wall. Leave 6–12 inches of clearance to reduce boundary effect doubling. Use the crawl test to find nulls and peaks.
Common DIY Pitfalls and Troubleshooting
Avoid these common errors to ensure success:
- Wrong Speaker Angle: Front speakers too far apart create a “hole” in the soundstage. Keep the angle between front left and right at 45–60 degrees.
- Subwoofer Integration Failure: If the subwoofer sounds “disconnected,” check the phase switch (0 vs. 180 degrees). Play an 80Hz test tone and select the setting with the most output.
- Mismatched Center Channel: A center speaker from a different brand or series causes tonal inconsistencies. Ensure the center speaker’s tweeter and woofer materials match the front speakers.
- Receiver Overheating: AV receivers require 5 inches of clearance above the chassis. Never stack components directly on top.
- Wire Length Miscalculation: Measure twice, cut once. Leave 2–3 feet of slack at each end for flexibility during speaker repositioning.
FAQ: Answering People Also Ask Queries
1. Can I use wireless speakers for a 5.1 or 7.1 setup?
Yes, but with critical caveats. Active wireless speakers (e.g., Fluance Ai61) eliminate speaker wires but require power outlets and introduce potential audio latency. For video content, latency should be below 20ms to avoid lip-sync issues. Use a wireless transmitter system like the SVS SoundPath Wireless Adapter for rear speakers; it supports CD-quality 48kHz/16-bit transmission.
2. Do I need a subwoofer for a 5.1 surround setup?
Technically, yes—the “.1” denotes a dedicated Low-Frequency Effects channel. Without a subwoofer, you miss deep bass effects (explosions, rumbling vehicles) and risk overloading your main speakers. The Crossover Frequency setting in your receiver ensures this.
3. What’s the difference between 5.1 and 7.1 for gaming?
A 7.1 system provides more precise rear directional cues for first-person shooters. However, object-based audio (e.g., Dolby Atmos for Headphones) can simulate 7.1 with stereo headphones. For competitive gaming, 5.1 is sufficient unless you have a dedicated gaming room with a 7.1-capable receiver.
4. Can I add rear surrounds later if my receiver only has 5 channels?
Yes, if your receiver has pre-outs for surround back channels or supports height channels. You can add an external two-channel amplifier (e.g., Emotiva BasX A2) and configure the receiver to assign pre-outs for rear surrounds. Otherwise, upgrade to a 7-channel receiver like the Denon AVR-S760H.
5. Should I buy a 5.1 speaker package or mix brands?
For beginners, a matched set (e.g., Monoprice 10565, Onkyo SKS-HT540) ensures consistent tonal balance across all frequencies. If mixing brands, the center channel must match the front left/right (same tweeter type and impedance). The center channel carries 70% of movie audio.
6. What is the ideal distance between rear and side speakers in a 7.1 setup?
Side surrounds should be 2–3 feet to the sides of the listening position, slightly behind. Rear surrounds should be 2–3 feet directly behind, at ear level or slightly above. Maintain a 120–150 degree angle from center for smooth panning.
7. Can I place a subwoofer in a cabinet?
No. Enclosed spaces cause port chuffing, distortion, and significant SPL loss. The subwoofer requires open air to move air efficiently. If space is tight, use a sealed subwoofer (e.g., SVS SB-1000) which is less sensitive to placement.
Building Your Authority-Driven, Personalized System
A DIY 5.1 or 7.1 surround sound setup is an achievable, rewarding project for any beginner with moderate technical skills and a willingness to learn. By studying a 5.1 surround sound setup diagram, understanding room acoustics, adhering to proper wire gauge practices, and leveraging automatic calibration tools like Audyssey MultEQ or YPAO R.S.C. , you can achieve cinema-quality audio without hiring a professional installer.
Final Recommendation: Start with a 5.1 system if you have a small-to-medium room (under 250 sq ft) or a limited budget. Upgrade to 7.1 when your space and content demands it. Invest in a quality AV receiver with robust room correction (Denon, Yamaha, or Marantz), a matching center channel, and a subwoofer with a 10-inch or larger driver. Spend the time to experiment with speaker placement and subwoofer position—the difference between a good system and a great one is often measured in inches.
The highest-performing surround sound system is one that is properly placed, accurately calibrated, and acoustically matched to its listening environment. By following these structured steps, you democratize access to professional-grade audio technology.